Teddy Bear Cake Recipe: A Fun and Delicious DIY Guide
When it comes to celebrating special occasions like birthdays, baby showers, or simply a fun gathering, a teddy bear cake can add an extra touch of charm and joy. This adorable cake design is perfect for both children and adults, and it can become a memorable centerpiece for your event. If you’re looking for a teddy bear cake recipe that combines delicious flavor with a cute and eye-catching design, you’ve come to the right place!
In this article, we’ll guide you through a comprehensive teddy bear cake recipe, provide decorating tips, and answer some common questions to ensure your cake is a sweet success.
What is a Teddy Bear Cake?
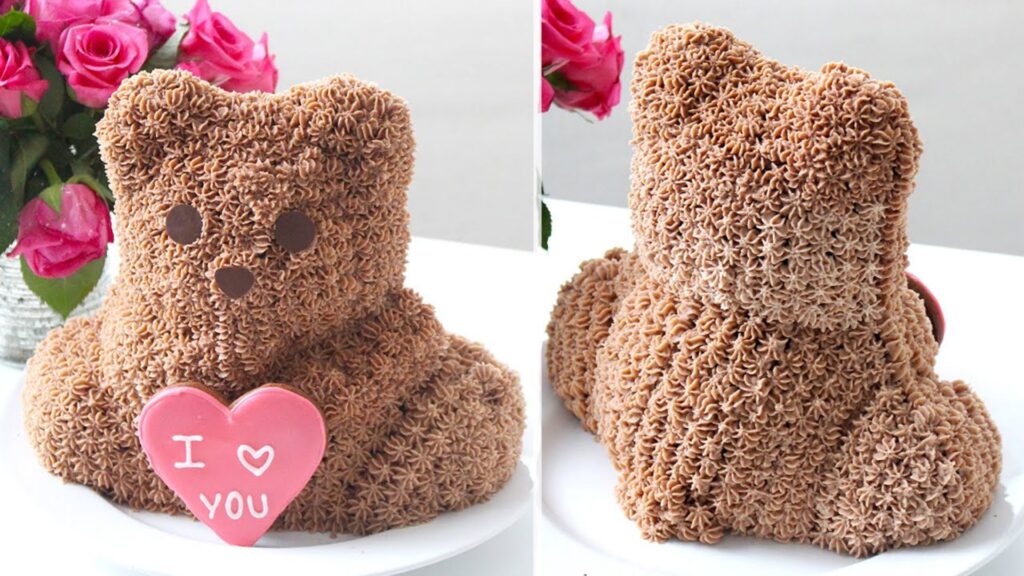
A teddy bear cake is a themed cake designed to resemble a teddy bear. It’s often used for celebrations like birthdays, baby showers, and children’s parties. The cake can be decorated to look like a classic teddy bear or customized to fit specific themes or colors. With its playful design and delicious flavor, a teddy bear cake is sure to bring smiles to everyone at your event.
How to Make Teddy Bear Cake Recipe
Ingredients
For the Cake:
- Vanilla Sponge Cake:
- 2 ½ cups (310g) all-purpose flour
- 2 cups (400g) granulated sugar
- 1 tablespoon baking powder
- ½ teaspoon salt
- ½ cup (115g) unsalted butter, softened
- 4 large eggs
- 1 cup (240ml) milk
- 2 teaspoons vanilla extract
- Chocolate Sponge Cake:
- 2 ½ cups (310g) all-purpose flour
- 2 cups (400g) granulated sugar
- ¾ cup (65g) unsweetened cocoa powder
- 1 tablespoon baking powder
- ½ teaspoon salt
- ½ cup (115g) unsalted butter, softened
- 4 large eggs
- 1 cup (240ml) milk
- 2 teaspoons vanilla extract
For the Frosting:
- Vanilla Buttercream:
- 1 cup (225g) unsalted butter, softened
- 3 ½ cups (440g) powdered sugar
- 1 teaspoon vanilla extract
- 2-3 tablespoons milk
- Chocolate Buttercream:
- 1 cup (225g) unsalted butter, softened
- 3 ½ cups (440g) powdered sugar
- ½ cup (45g) unsweetened cocoa powder
- 2 teaspoons vanilla extract
- 2-3 tablespoons milk
For Decoration:
- Fondant:
- 1 cup light brown fondant (for teddy bear’s body)
- ¼ cup dark brown fondant (for teddy bear’s nose and ears)
- ¼ cup pink fondant (for teddy bear’s cheeks)
- ¼ cup black fondant (for teddy bear’s eyes and mouth)
- ¼ cup white fondant (for accents and highlights)
- Edible Markers and Sprinkles:
- Edible markers for fine details
- Optional sprinkles for added decoration
Instructions
1. Prepare the Cake Layers:
- Preheat the Oven:
Preheat your oven to 350°F (175°C). Grease and flour two 8-inch round cake pans or line them with parchment paper. - Make Vanilla Cake Batter:
- In a medium bowl, whisk together the flour, sugar, baking powder, and salt.
- In a large mixing bowl, cream the butter and sugar until light and fluffy. Add the eggs one at a time, beating well after each addition. Mix in the vanilla extract.
- Gradually add the dry ingredients to the butter mixture, alternating with the milk, until the batter is smooth.
- Divide the batter evenly between the prepared pans. Bake for 25-30 minutes, or until a toothpick inserted into the center comes out clean. Cool the cakes completely on a wire rack.
- Make Chocolate Cake Batter:
- Follow the same steps as for the vanilla cake, but incorporate cocoa powder into the dry ingredients.
- Bake and cool as directed above.
2. Prepare the Frosting:
- Make Vanilla Buttercream:
- Beat the softened butter until creamy. Gradually add powdered sugar, beating well after each addition. Mix in vanilla extract and enough milk to reach your desired consistency.
- Make Chocolate Buttercream:
- Follow the same process as for the vanilla buttercream, but add cocoa powder along with the powdered sugar. Adjust the milk as needed.
3. Assemble the Cake:
- Level the Cakes:
- Use a serrated knife to level the tops of the cooled cakes. This ensures a flat surface for decorating.
- Layer and Frost:
- Place one layer of cake on a serving plate. Spread a layer of frosting over it. Add the second layer of cake and apply a crumb coat (a thin layer of frosting to seal in crumbs). Chill the cake in the refrigerator for 30 minutes to set.
- Apply the Final Coat:
- Spread a thick layer of your chosen frosting (vanilla or chocolate) over the entire cake. Smooth it out with a spatula or bench scraper.
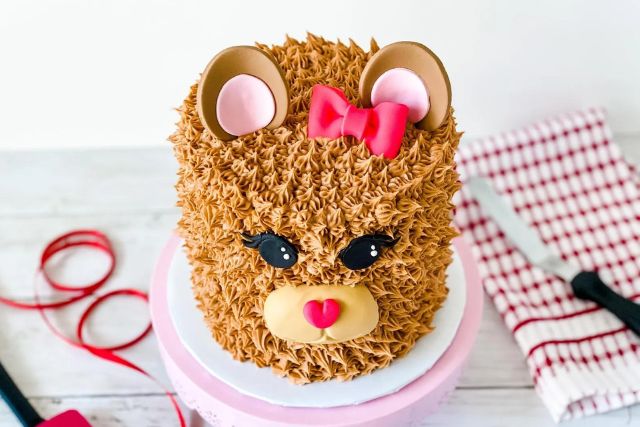
4. Decorate the Cake:
- Prepare Fondant Decorations:
- Roll out the light brown fondant and cover the cake with it, smoothing out any wrinkles. This will be the base for your teddy bear’s body.
- Use the dark brown fondant to create the teddy bear’s nose, ears, and other facial features. Shape the fondant into small pieces and attach them to the cake using a little water or edible glue.
- Use pink fondant for the cheeks and white fondant for any accents or highlights.
- Add Fine Details:
- Use edible markers to draw the teddy bear’s eyes, mouth, and other fine details. This will bring your teddy bear to life and add personality to the cake.
- Optional Decorations:
- Add sprinkles or additional fondant decorations if desired. This could include tiny bows, flowers, or other themed elements.
Tips for a Perfect Teddy Bear Cake Recipe
- Choose the Right Flavors:
Vanilla and chocolate are classic flavors, but feel free to experiment with other flavors such as red velvet, lemon, or coffee to match your preference. - Use Quality Ingredients:
For the best results, use high-quality butter, vanilla extract, and cocoa powder. This will ensure your cake not only looks great but also tastes delicious. - Practice Fondant Techniques:
If you’re new to working with fondant, practice rolling and cutting it before decorating your cake. This will help you achieve cleaner designs and avoid mistakes. - Prepare Decorations in Advance:
Fondant decorations can be made a few days ahead of time and stored in an airtight container. This will save you time on the day of decorating and ensure everything is ready for your event. - Smooth Cake Layers:
Apply a crumb coat before the final layer of frosting to create a smooth surface. Chill the cake to set the crumb coat and make frosting easier.
A teddy bear cake is a delightful way to celebrate any occasion with a touch of whimsy and sweetness. With this teddy bear cake recipe, you can create a charming and delicious cake that will be the highlight of your event. Enjoy the process of baking and decorating, and most importantly, have fun creating a cake that captures the joy and warmth of your celebration.
FAQs About Teddy Bear Cake Recipe
Can I make the cake layers in advance?
Yes, you can bake the cake layers up to a week in advance. After they have completely cooled, wrap them tightly in plastic wrap and freeze. Thaw before frosting. You can also prepare the frosting and fondant decorations ahead of time.
How can I make the cake gluten-free?
To make a gluten-free teddy bear cake, substitute all-purpose flour with a gluten-free flour blend. Ensure that the baking powder and other ingredients are also gluten-free. The texture may vary slightly, but the flavor will still be enjoyable.
Can I use store-bought fondant for this cake?
Yes, store-bought fondant is a convenient and easy option for decorating cakes. It comes in various colors and is perfect for creating detailed decorations like teddy bear features.
How do I prevent fondant from drying out?
To keep fondant from drying out, store it in an airtight container when not in use. If it becomes too dry, knead in a small amount of vegetable shortening or water to restore its pliability.
What if I don’t have all the fondant colors I need?
If you don’t have the exact colors of fondant, you can tint white fondant with food coloring. Knead the color into the fondant until you achieve the desired shade. This allows you to create a wide range of colors for your decorations.