Beach Plum Jelly Recipe : A Delicious Coastal Treat
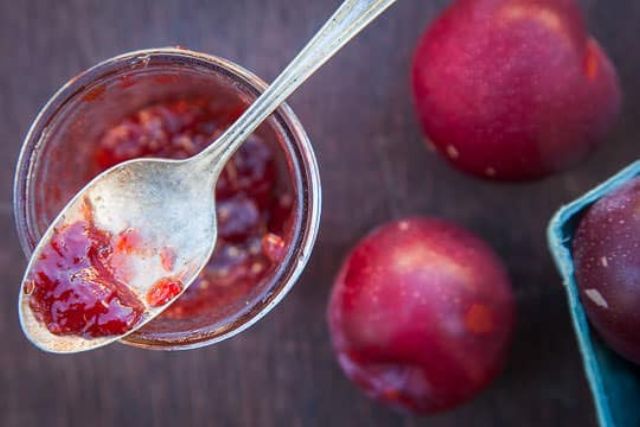
Beach plum jelly is a delightful and unique preserve that captures the essence of coastal summers. Made from beach plums, which are native to the Atlantic coast of the United States, this jelly has a distinctive, tangy flavor that’s perfect for spreading on toast, pairing with cheese, or gifting to friends and family. In this article, we will explore the history of beach plums, the health benefits of beach plum jelly, and provide a detailed, step-by-step beach plum jelly recipe. Whether you’re an experienced canner or a beginner, you’ll find everything you need to create this delicious treat.
What Are Beach Plums?
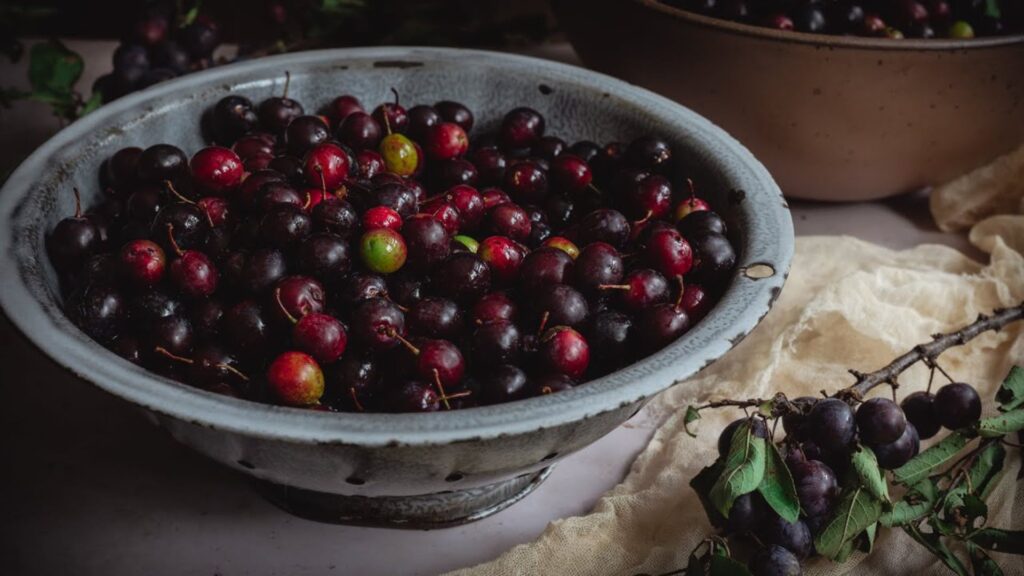
Beach plums (Prunus maritima) are small, wild plums that grow along the Atlantic coast, from Maine to Virginia. These hardy shrubs thrive in sandy soils and are often found in coastal dunes and salt marshes. Beach plums are typically harvested in late summer, and their fruit can range in color from deep purple to red or yellow. Despite their small size, beach plums pack a punch of flavor, with a tartness that makes them perfect for jellies, jams, and other preserves.
Health Benefits of Beach Plum Jelly Recipe
Beach plums are not only delicious but also packed with nutrients. They are rich in vitamins A and C, which are essential for immune function and skin health. They also contain antioxidants, which help protect the body from free radicals and reduce the risk of chronic diseases. Additionally, beach plums are a good source of dietary fiber, which aids in digestion and promotes a healthy gut.
Ingredients for Beach Plum Jelly Recipe
To make beach plum jelly Recipe, you’ll need the following ingredients:
- 4 cups of beach plums, washed and stemmed
- 4 cups of water
- 5 cups of granulated sugar
- 1 package of powdered pectin (1.75 ounces)
- 1/4 cup of lemon juice
Equipment Needed
- Large pot
- Jelly bag or cheesecloth
- Canning jars with lids and bands
- Canning funnel
- Ladle
- Water bath canner or large stockpot
- Jar lifter
- Tongs
Step-by-Step Beach Plum Jelly Recipe
Step 1: Prepare the Beach Plums
- Wash and Stem the Plums: Begin by washing the beach plums thoroughly to remove any dirt or debris. Remove the stems and any leaves.
- Cook the Plums: Place the beach plums in a large pot and add 4 cups of water. Bring the mixture to a boil, then reduce the heat and simmer for about 20 minutes, or until the plums are soft and have burst open.
Step 2: Extract the Juice
- Mash the Plums: Using a potato masher or the back of a spoon, mash the cooked plums to release more juice.
- Strain the Juice: Line a colander with a jelly bag or several layers of cheesecloth. Place the colander over a large bowl and pour the plum mixture into the jelly bag. Allow the juice to drain for several hours or overnight. For clearer jelly, avoid pressing or squeezing the bag.
Step 3: Prepare the Jelly
- Measure the Juice: Measure the amount of plum juice you have. You should have about 4 cups. If you have less, you can add a little water to make up the difference.
- Combine Juice, Sugar, and Pectin: In a large pot, combine the plum juice, lemon juice, and powdered pectin. Stir to dissolve the pectin. Bring the mixture to a full rolling boil over high heat, stirring constantly.
- Add Sugar: Add the granulated sugar all at once, stirring to dissolve. Return the mixture to a full rolling boil and boil for 1-2 minutes, stirring constantly. The mixture should thicken and become clear.
Step 4: Test for Gel Stage
- Test the Jelly: To test if the jelly has reached the gel stage, place a small plate in the freezer for a few minutes. Remove the plate and drop a small spoonful of the hot jelly onto it. Let it cool for a few seconds, then push the edge of the jelly with your finger. If it wrinkles and holds its shape, it is ready. If not, continue boiling for another minute and test again.
Step 5: Can the Jelly
- Prepare the Jars: While the jelly is cooking, sterilize your canning jars, lids, and bands. You can do this by boiling them in water for 10 minutes or running them through a hot dishwasher cycle.
- Fill the Jars: Using a canning funnel and ladle, carefully fill the hot, sterilized jars with the hot jelly, leaving about 1/4 inch of headspace. Wipe the rims of the jars with a clean, damp cloth to remove any jelly residue.
- Seal the Jars: Place the lids on the jars and screw on the bands until they are fingertip tight.
- Process the Jars: Place the jars in a water bath canner or large stockpot with a rack on the bottom. Ensure the jars are covered by at least 1 inch of water. Bring the water to a boil and process the jars for 10 minutes. Adjust the processing time if you are at a high altitude.
Step 6: Cool and Store
- Cool the Jars: Using a jar lifter, carefully remove the jars from the water bath and place them on a towel or cooling rack. Allow them to cool undisturbed for 12-24 hours.
- Check the Seals: Once the jars are cool, check the seals by pressing down on the center of each lid. If it does not pop back, the jar is sealed. If any jars did not seal properly, refrigerate them and use them within a few weeks.
- Label and Store: Label the jars with the date and store them in a cool, dark place. Properly sealed jars of beach plum jelly can be stored for up to a year.
Tips for Making the Perfect Beach Plum Jelly Recipe
- Choose Ripe Plums: Select fully ripe beach plums for the best flavor and highest pectin content.
- Avoid Squeezing the Bag: When extracting the juice, avoid squeezing the jelly bag, as this can make the jelly cloudy.
- Use a Candy Thermometer: If you’re unsure about the gel stage, you can use a candy thermometer. The jelly should reach a temperature of 220°F (104°C) at sea level.
- Adjust for Altitude: If you live at a high altitude, adjust the processing time in the water bath canner accordingly. Add 1 minute for every 1,000 feet above sea level.
Serving Suggestions for Beach Plum Jelly Recipe
Beach plum jelly Recipe is versatile and can be enjoyed in many ways:
- On Toast: Spread it on toast, English muffins, or bagels for a delicious breakfast treat.
- With Cheese: Pair it with a variety of cheeses, such as Brie, goat cheese, or sharp cheddar, for a delightful appetizer.
- As a Glaze: Use it as a glaze for meats, such as pork or chicken, for a sweet and tangy flavor.
- In Desserts: Incorporate it into desserts, like thumbprint cookies, tarts, or as a filling for cakes and pastries.
Beach plum jelly Recipe is a delightful and unique preserve that brings a taste of the coast to your table. With its tangy flavor and beautiful color, it’s a wonderful addition to breakfasts, appetizers, and desserts. By following this step-by-step guide, you’ll be able to create your own batch of delicious beach plum jelly. Whether you’re a seasoned canner or new to preserving, this recipe is sure to become a favorite. Enjoy the process, and savor the delicious results of your homemade beach plum jelly!
Frequently Asked Questions (FAQs)
Can I use frozen beach plums to make jelly?
Yes, you can use frozen beach plums to make jelly. Simply thaw them before starting the recipe. Frozen plums retain their flavor and nutritional value, making them a great option when fresh plums are not available.
How long does beach plum jelly last?
Properly sealed jars of beach plum jelly can last up to a year when stored in a cool, dark place. Once opened, refrigerate the jelly and use it within a few weeks.
Can I reduce the amount of sugar in the recipe?
Reducing the sugar in jelly recipes can affect the gel set and preservation. If you prefer a lower-sugar option, look for low-sugar pectin and follow the instructions provided with it to ensure proper gelling.
What can I do if my jelly doesn’t set?
If your jelly doesn’t set, you can try re-cooking it. Combine the jelly with additional pectin and bring it back to a boil. Follow the gel test and canning process again. Alternatively, use the unset jelly as a syrup for pancakes or waffles.
Are beach plums safe to eat raw?
Beach plums can be eaten raw, but they are quite tart and are often better suited for making jellies, jams, and other preserves. Cooking beach plums with sugar helps balance their tartness and enhances their flavor.