Chiroti Recipe : Unveiling the Art of Making Crispy Indian Dessert Delights
In the realm of Indian sweets, Chiroti stands out as a delicacy that combines intricate preparation with delightful flavors. Originating from Karnataka, particularly popular in Kannada-speaking regions, Chiroti is a crispy, layered dessert that is often served during festivals, weddings, and special occasions. Its preparation involves patience, skill, and a few key ingredients that come together to create a sweet treat that melts in your mouth. In this comprehensive guide, we will explore the origins of Chiroti Recipe, discuss its cultural significance, detail its ingredients, and provide you with a step-by-step recipe to master this beloved dessert at home.
Origins and Cultural Significance of Chiroti Recipe
Chiroti holds a special place in Karnataka’s culinary heritage, particularly in Kannada Brahmin households where it is prepared with great care and served as part of traditional feasts. The name “Chiroti” is derived from the Kannada word “Chiroti” or “Chirotu,” which refers to the flaky and crispy texture of this dessert.
Historically, Chiroti is believed to have originated from Mysore, Karnataka, and has since spread to other parts of South India. It is a dessert deeply rooted in cultural celebrations, often symbolizing auspicious beginnings, prosperity, and joyous occasions like weddings and religious festivals such as Diwali and Ugadi.
Ingredients You’ll Need to Make Chiroti Recipe
Before diving into the recipe, gather the following ingredients to make Chiroti:
- 1 cup all-purpose flour (maida)
- 1 tablespoon fine semolina (rava)
- 2 tablespoons ghee (clarified butter), melted
- A pinch of salt
- Water, as needed to make a stiff dough
- Ghee or oil, for deep-frying
- Powdered sugar, for dusting
Step-by-Step Chiroti Recipe
Now, let’s explore the step-by-step process of making Chiroti:
Step 1: Making the Dough
- Mixing the Ingredients: In a large mixing bowl, combine the all-purpose flour, fine semolina, melted ghee, and a pinch of salt. Mix well using your fingers or a spoon until the ghee is evenly distributed.
- Kneading the Dough: Gradually add water, a little at a time, and knead into a stiff yet pliable dough. The dough should not be too soft. Cover it with a damp cloth and let it rest for about 30 minutes.
Step 2: Preparing the Layers
- Dividing the Dough: After resting, divide the dough into small lemon-sized balls.
- Rolling Out the Balls: Take one ball of dough and roll it out into a very thin, large circle on a clean, dry surface using a rolling pin. The thinner you roll it, the more layers your Chiroti will have, resulting in a crispier texture.
- Applying Ghee: Brush a thin layer of melted ghee evenly over the rolled-out dough circle.
- Layering: Place another rolled-out dough circle on top of the first one and repeat the process of brushing with ghee. Continue layering until you have a stack of 4-5 rolled-out dough circles.
- Final Layer: For the top layer, roll out one last dough circle without applying ghee.
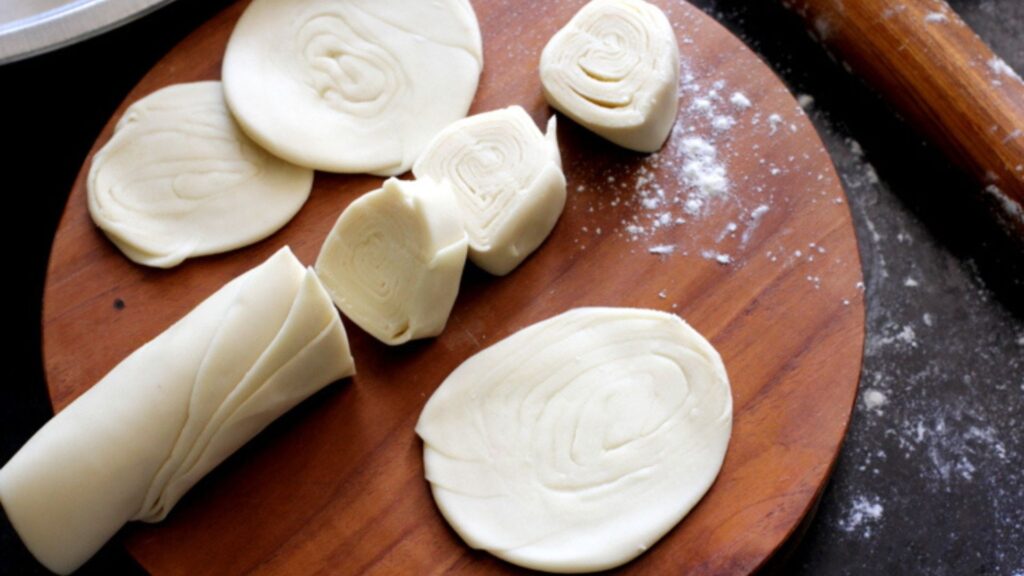
Step 3: Folding and Cutting
- Folding the Stack: Carefully fold the stacked dough from one end to form a long strip.
- Cutting into Strips: Cut the folded strip into smaller sections, about 2 inches wide.
- Rolling Each Strip: Take each cut strip and roll it up like a spiral or a coil. Press the ends to seal.
Step 4: Frying Chiroti
- Heating Ghee or Oil: Heat ghee or oil in a deep frying pan or kadhai over medium heat. The ghee or oil should be hot but not smoking.
- Frying Chiroti: Carefully slide each rolled-up Chiroti into the hot ghee or oil. Fry in batches, turning occasionally, until they turn golden brown and crisp on all sides.
- Draining Excess Oil: Remove the fried Chiroti using a slotted spoon and drain them on paper towels to remove excess oil.
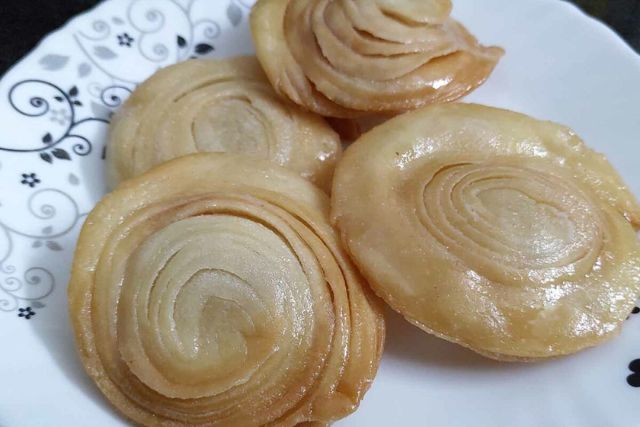
Step 5: Serving Chiroti
- Cooling: Allow the fried Chiroti to cool completely on a wire rack or a plate.
- Dusting with Sugar: Once cooled, generously dust the Chiroti with powdered sugar on all sides.
- Storage: Store Chiroti in an airtight container at room temperature. They stay crispy for several days when stored properly.
Tips for Perfect Chiroti Recipe
- Dough Consistency: Ensure the dough is kneaded to a stiff consistency to achieve crispy Chiroti.
- Rolling Technique: Roll out the dough circles as thinly as possible to create flaky layers.
- Frying Temperature: Maintain medium heat while frying to ensure even cooking and crispiness without burning.
Health Benefits of Chiroti Recipe
While Chiroti Recipe is undoubtedly a treat best enjoyed in moderation due to its deep-fried nature, it does offer some nutritional benefits:
- Source of Energy: Chiroti provides quick energy due to its carbohydrate content from all-purpose flour and ghee.
- Cultural and Festive Significance: Chiroti is deeply embedded in cultural celebrations and festivities in Karnataka, making it a symbol of tradition and joy.
- Versatility: Chiroti can be enjoyed on its own as a dessert or paired with savory dishes as part of a festive meal.
Chiroti epitomizes the artistry and tradition of Karnataka’s culinary heritage, offering a delightful blend of crispy layers and sweet indulgence. Whether you’re celebrating a special occasion or simply exploring new flavors, mastering the art of making Chiroti Recipe at home allows you to savor its rich cultural history and festive charm. With its crispy exterior and melt-in-your-mouth texture, Chiroti promises to delight your taste buds and add a touch of sweetness to your culinary repertoire. Embrace the magic of Karnataka’s beloved dessert and share the joy of Chiroti with family and friends, celebrating tradition, flavor, and the joy of homemade delicacies.
FAQs About Chiroti Recipe
Can Chiroti be made ahead of time?
Yes, Chiroti can be made ahead of time and stored in an airtight container at room temperature for several days.
Can I bake Chiroti instead of frying?
Traditionally, Chiroti is deep-fried to achieve its characteristic crispiness. Baking may not yield the same texture.
Is Chiroti gluten-free?
No, Chiroti is made from all-purpose flour (maida), which contains gluten.
How do I prevent Chiroti from becoming soggy?
Ensure Chiroti are completely cooled before storing them in an airtight container. Excess moisture can make them lose their crispiness.
Can I freeze Chiroti?
It’s best not to freeze Chiroti as they may lose their texture and crispiness upon thawing.
What are the variations of Chiroti?
Variations include adding powdered nuts or cardamom to the dough for flavor enhancement.
What is the best way to serve Chiroti?
Serve Chiroti dusted with powdered sugar as a dessert or alongside other traditional sweets during festive occasions.
Can I make Chiroti without semolina (rava)?
Yes, you can omit semolina, but it adds texture to the Chiroti.
How do I reheat Chiroti?
Reheat Chiroti in a preheated oven at a low temperature (about 300°F or 150°C) for a few minutes to restore crispiness.
Is Chiroti suitable for vegetarians?
Yes, Chiroti is vegetarian as it does not contain any meat or animal-derived ingredients.