Mickey Mouse Cake Recipe : Step-by-Step Guide to Magical Dessert
Mickey Mouse, Disney’s iconic character, has delighted generations of children and adults alike with his cheerful personality and timeless appeal. What better way to celebrate a special occasion than with a homemade Mickey Mouse Cake Recipe? In this comprehensive guide, we’ll take you through the process of creating a delightful Mickey Mouse-themed cake that not only looks impressive but also tastes delicious. Whether it’s a birthday party, a Disney-themed celebration, or just a fun baking project with the kids, this cake is sure to bring smiles and joy to everyone who sees and tastes it.
Why Choose a Mickey Mouse Cake?
A Mickey Mouse cake is more than just a dessert; it’s a symbol of happiness, nostalgia, and magic. Whether you’re planning a child’s birthday party or surprising a Disney enthusiast, this cake is guaranteed to be a showstopper. With its whimsical design and familiar character, it brings the beloved world of Disney right to your celebration. Plus, baking and decorating a Mickey Mouse cake Recipe can be a rewarding and creative experience for both beginners and experienced bakers alike.
Essential Ingredients for Mickey Mouse Cake Recipe
Before you begin baking, gather these essential ingredients to create your Mickey Mouse masterpiece:
- Cake Flour: Provides a light and fluffy texture to the cake layers.
- Sugar: Sweetens the batter and adds moisture.
- Butter: Adds richness and flavor to the cake.
- Eggs: Bind the ingredients together and provide structure.
- Baking Powder and Baking Soda: Leavening agents that help the cake rise.
- Vanilla Extract: Enhances the flavor of the cake.
- Milk: Adds moisture and richness to the batter.
For the frosting and decorations:
- Buttercream Frosting: Smooth and creamy, perfect for decorating.
- Food Coloring (Black, Red, Yellow): For creating Mickey Mouse’s iconic colors.
- Fondant: Optional for creating detailed decorations.
- Candy or edible decorations: For adding extra flair to your cake.
Step-by-Step Mickey Mouse Cake Recipe
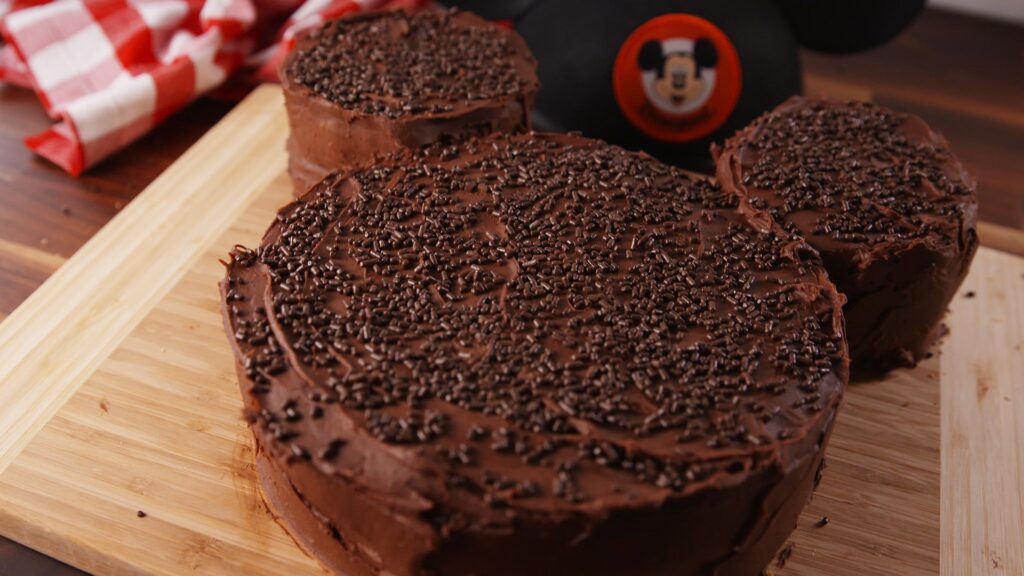
Cake Preparation:
- Preheat Your Oven: Set it to the temperature specified in your recipe (usually around 350°F or 175°C).
- Prepare Your Cake Pans: Grease and flour three 8-inch round cake pans.
- Mix Dry Ingredients: In a medium bowl, whisk together cake flour, baking powder, and baking soda. Set aside.
- Cream Butter and Sugar: In a large mixing bowl, beat softened butter and sugar until light and fluffy.
- Add Eggs and Vanilla: Beat in eggs, one at a time, then add vanilla extract.
- Alternate Adding Dry Ingredients and Milk: Gradually add the dry ingredients to the butter mixture, alternating with milk. Begin and end with the dry ingredients.
- Mix Until Combined: Mix until the batter is smooth and well combined.
- Divide Batter: Divide the batter evenly between the prepared cake pans.
- Bake: Place pans in the preheated oven and bake for 25-30 minutes, or until a toothpick inserted into the center comes out clean.
- Cool: Remove cakes from pans and cool completely on wire racks before frosting.
Decorating Your Mickey Mouse Cake Recipe
- Prepare Buttercream Frosting: Make a batch of buttercream frosting and divide it into portions. Leave one portion white, and dye the other portions with black, red, and yellow food coloring.
- Assemble Cake Layers: Place one cake layer on a serving plate or cake stand. Spread a layer of frosting on top.
- Stack Layers: Add the second cake layer and repeat the process of frosting. Top with the third cake layer.
- Crumb Coat: Apply a thin layer of white frosting all over the cake to seal in crumbs. Chill in the refrigerator for 30 minutes.
- Final Frosting: Frost the entire cake with the remaining white frosting, smoothing the sides and top as evenly as possible.
- Decorate with Colors: Use black frosting to outline Mickey Mouse’s ears and facial features. Use red and yellow frosting to fill in Mickey’s shorts and shoes.
- Add Details: Use fondant or additional frosting to create Mickey Mouse’s eyes, nose, and mouth.
- Personalize: Add any additional decorations or personalized touches to make the cake unique.
Serving Your Mickey Mouse Cake
Once decorated, your Mickey Mouse cake is ready to be served and enjoyed! Place it proudly on your dessert table as the centerpiece of your celebration. Pair slices with milk, coffee, or your favorite beverage to complement the sweetness of the cake.
Tips for Success
- Room Temperature Ingredients: Ensure your butter, eggs, and milk are at room temperature for optimal mixing and baking.
- Even Layers: Use a serrated knife or cake leveler to ensure your cake layers are even and flat before frosting.
- Frosting Techniques: Watch tutorials or practice piping techniques for a polished and professional finish to your cake.
Baking a Mickey Mouse cake is not just about creating a delicious dessert; it’s about creating memories and bringing joy to those you love. Whether you’re celebrating a birthday, a special milestone, or simply indulging in a creative baking project, this cake is sure to be a hit. With its whimsical design and familiar character, it captures the magic of Disney and adds a touch of enchantment to any occasion. So, gather your ingredients, unleash your creativity, and get ready to create a Mickey Mouse cake recipe that will be remembered long after the last crumb is gone.
Frequently Asked Questions (FAQs) about Mickey Mouse cake Recipe
Can I use a different type of frosting?
Yes, you can use whipped cream frosting or cream cheese frosting for a different flavor and texture.
How can I store leftover cake?
Store leftover cake covered in the refrigerator for up to 3-4 days. Bring to room temperature before serving.
Can I freeze the cake?
Yes, unfrosted cake layers can be tightly wrapped in plastic wrap and aluminum foil, then frozen for up to 3 months. Thaw in the refrigerator overnight before frosting and decorating.
Can I make this cake ahead of time?
Yes, you can bake the cake layers and store them in an airtight container at room temperature for up to two days before assembling and decorating.
Where can I find Mickey Mouse-themed cake decorations?
Specialty baking stores, online retailers, and party supply shops often carry a variety of Mickey Mouse-themed cake decorations, including toppers, edible images, and candles.

