🍛 Pav Bhaji Recipe: A Flavor-Packed Street Food Classic You Can Master at Home
If there’s one recipe that instantly takes every Indian foodie straight to the heart of Mumbai, it’s the irresistible, buttery, spicy delight known as pav bhaji. Imagine this: a luscious medley of mashed vegetables cooked in aromatic spices, served piping hot with butter-toasted buns and a generous squeeze of lemon. Hungry yet?
This iconic Indian street food is comfort in a plate (or should we say, a steel tray?). And while it might look like a dish best left to your favorite street vendor, making it at home is easier than you’d think. Whether you’re a beginner in the kitchen or a seasoned home cook, this pav bhaji recipe will help you recreate the taste of Juhu Beach in your very own kitchen.
Let’s dive right in and uncover everything you need to know to cook, serve, and savor homemade pav bhaji like a pro.
🌆 What is Pav Bhaji?
Pav bhaji is a beloved Maharashtrian street food, originally born in the textile mills of Mumbai. Workers needed something quick, hearty, and satisfying—and pav bhaji was the perfect answer. Over time, it evolved into a cult favorite across India.
- Bhaji: a spiced, mashed vegetable curry made with potatoes, tomatoes, green peas, and other veggies.
- Pav: soft, buttered bread rolls lightly toasted on a tawa (griddle) until golden brown.
Together? Absolute magic.
🛒 Ingredients for the Perfect Pav Bhaji
To get that authentic Mumbai street-style pav bhaji, it’s all about building bold flavors. The ingredient list is simple, but don’t be fooled—it packs a punch.
🥕 Vegetables:
- 3 medium potatoes, boiled and mashed
- 1 cup cauliflower florets, chopped
- 1/2 cup green peas (fresh or frozen)
- 1 large onion, finely chopped
- 2 medium tomatoes, finely chopped
- 1 medium capsicum (green bell pepper), chopped
- 1 tsp ginger-garlic paste
- 1–2 green chilies (optional), finely chopped
🧂 Spices:
- 1–2 tbsp pav bhaji masala (store-bought or homemade)
- 1/2 tsp red chili powder (adjust to taste)
- 1/4 tsp turmeric powder
- Salt to taste
🧈 Other:
- 2–3 tbsp butter (don’t skimp!)
- 1 tbsp oil
- 1 tbsp lemon juice
- Fresh coriander leaves, chopped
- Water (as needed to adjust consistency)
🥖 For the Pav:
- 8 pav buns
- 2 tbsp butter
- Pinch of pav bhaji masala (for toasting buns)
👩🍳 How to Make Pav Bhaji – Step-by-Step
Now for the fun part: let’s make the magic happen! Here’s your complete pav bhaji recipe, broken down into easy, manageable steps.
Step 1: Prep and Boil the Veggies
Start by boiling the potatoes, cauliflower, and green peas until soft. You can do this in a pressure cooker (2 whistles) or boil them in a pot until tender.
Once cooked, mash them coarsely with a masher. You want a slightly chunky texture—not baby food smooth.
Step 2: Sauté the Onions and Tomatoes
Heat butter and a little oil in a large pan or tawa.
- Add chopped onions and sauté until golden brown.
- Add ginger-garlic paste and sauté until fragrant.
- Stir in chopped tomatoes and cook until soft and mushy.
- Toss in the chopped capsicum and cook for 2–3 minutes.
Step 3: Add Spices and Cook the Bhaji
Once the veggies are well cooked:
- Add pav bhaji masala, red chili powder, and turmeric.
- Stir and cook the masala until oil starts to separate.
- Add the boiled and mashed vegetables.
- Mix everything together thoroughly.
- Add some water (around 1 cup) to reach a semi-thick curry consistency.
- Let it simmer for 10–15 minutes, mashing as it cooks.
Taste and adjust salt, spice, and butter (more butter = more flavor!).
Step 4: Toast the Pav
Slice the pav buns horizontally but not all the way through.
On a hot tawa, melt some butter, sprinkle a bit of pav bhaji masala, and toast the buns until golden and slightly crisp.
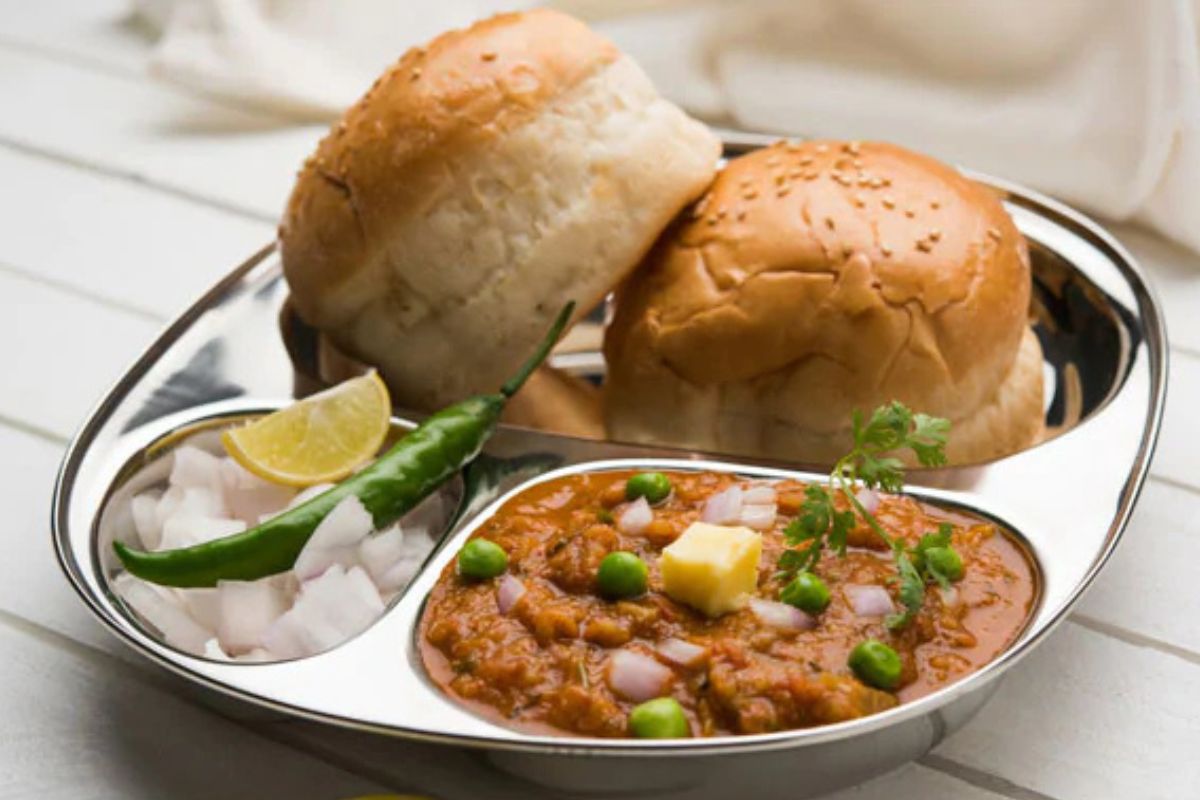
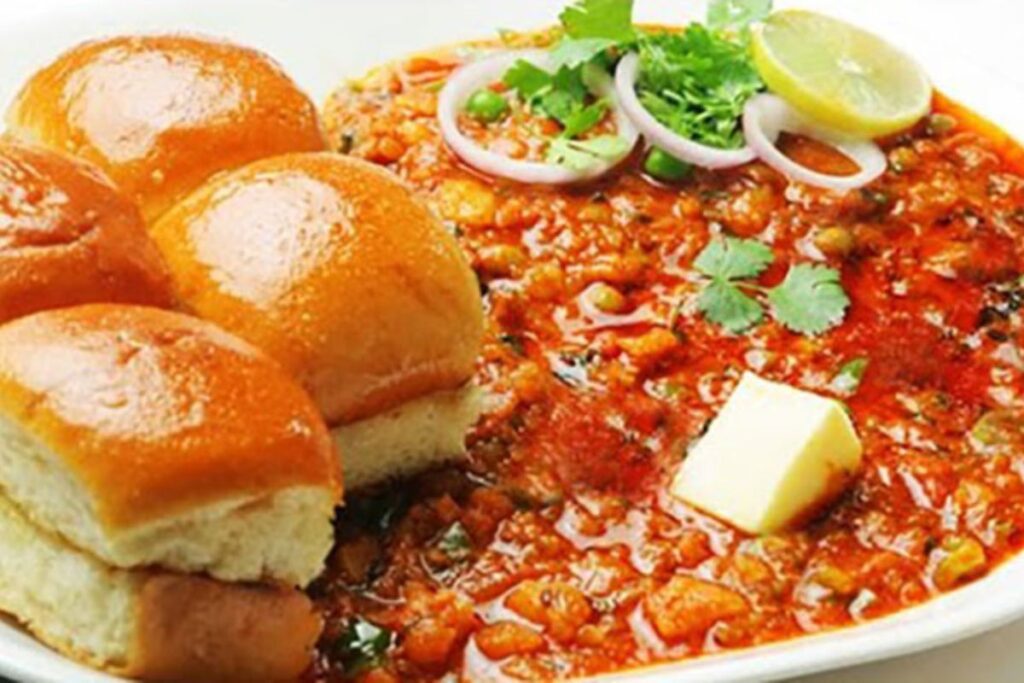
Step 5: Garnish and Serve
To serve:
- Ladle the hot, spicy bhaji into a plate or bowl.
- Garnish with a dollop of butter, chopped onions, coriander, and lemon wedges.
- Place toasted pav on the side, ready to be scooped into that delicious mess.
And there you have it—authentic Mumbai pav bhaji, made right in your own kitchen.
🍋 Bonus Tip: A splash of lemon juice before eating lifts all the flavors beautifully.
🔄 Pav Bhaji Variations Worth Trying
Once you’ve nailed the basic pav bhaji recipe, there are plenty of fun spins to try.
1. Cheese Pav Bhaji
Top your bhaji with a generous handful of grated Amul cheese. Super indulgent and perfect for cheese lovers.
2. Paneer Pav Bhaji
Add some crumbled paneer toward the end for added texture and protein.
3. Jain Pav Bhaji
Make it without onions, garlic, or root vegetables like potatoes—substitute raw banana or bottle gourd.
4. Butter Pav Bhaji
Double (or triple!) the butter for that ultimate street-style experience. Not for the faint of heart.
5. Tawa Pulao
Use leftover bhaji as a base and mix with cooked rice to create a flavorful, spiced rice dish.
🧊 Storing and Reheating Tips
Good news—pav bhaji stores well and tastes even better the next day.
- Refrigerate: Store leftover bhaji in an airtight container for up to 3 days.
- Freeze: Freeze in meal-size portions for up to 1 month. Thaw overnight before reheating.
- Reheat: Gently heat on a pan, adding water or butter to loosen the texture. Avoid microwaving for best taste.
🥗 What to Serve with Pav Bhaji
Sure, pav bhaji is a complete meal in itself, but here are some accompaniments that elevate the experience:
- Chopped onions and lemon wedges – mandatory!
- Fried green chilies – for spice lovers.
- Cold drinks or sweet lassi – to balance the heat.
- Papad or pickles on the side for extra crunch.
🏆 Why This Pav Bhaji Recipe Will Become Your Go-To
There’s something undeniably satisfying about making pav bhaji from scratch. It’s:
- ✅ Easy to cook in under an hour
- ✅ Perfect for batch cooking and freezing
- ✅ Fully vegetarian and customizable
- ✅ Kid-friendly and spice-adjustable
- ✅ Affordable and filling
Plus, it’s a total crowd-pleaser. Whether you’re cooking for family, entertaining guests, or meal-prepping for the week, this homemade pav bhaji recipe delivers on all fronts.
✨ Pav Bhaji Is More Than a Recipe—It’s an Experience
Making pav bhaji at home isn’t just about whipping up a meal. It’s about channeling that street food vibe, that warm sense of nostalgia, that moment when you sit back with a buttered pav in one hand and a spicy scoop of bhaji in the other.
This dish is for everyone—students, professionals, home chefs, or anyone who simply wants to experience the flavors of India’s most iconic street food. Once you try this pav bhaji recipe, you’ll realize just how easy (and rewarding) it is to bring a little taste of Mumbai right to your table.
So grab your ingredients, put on your apron, and get ready to stir up some joy. Your pav bhaji party is just a few steps away.