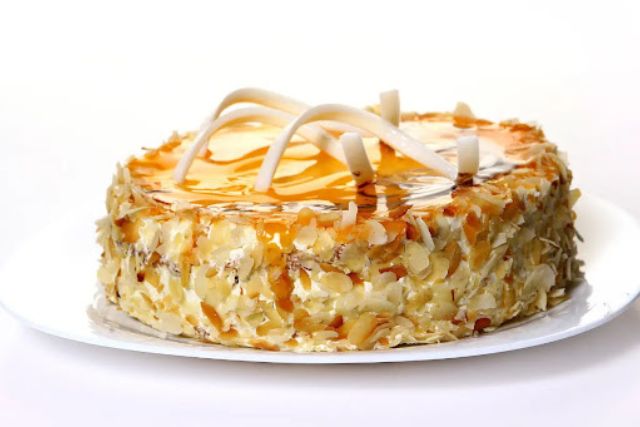
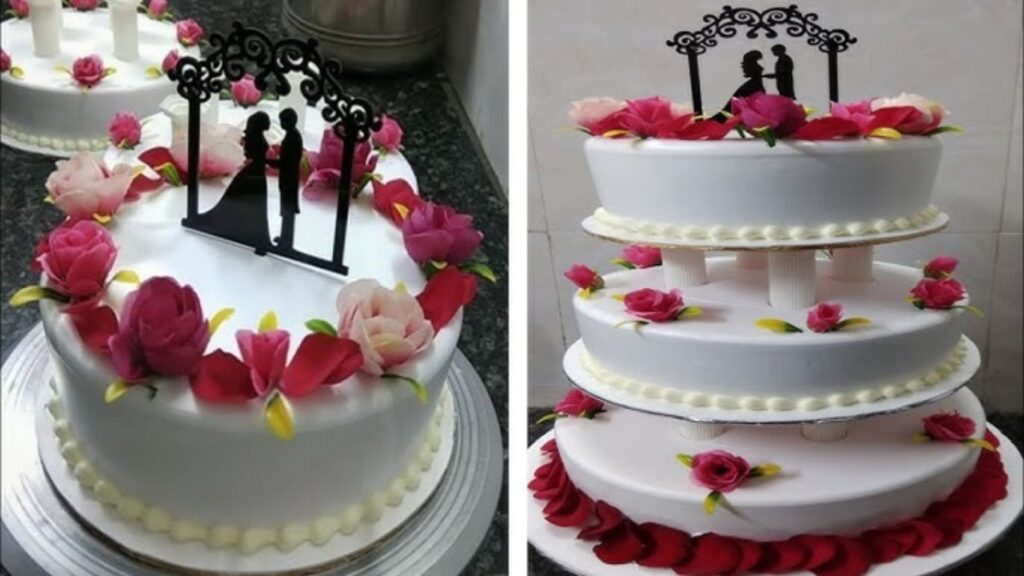
Ring Ceremony Cake Recipe: A Sweet Touch to Your Special Day
When it comes to celebrating life’s most cherished moments, the ring ceremony stands out as a significant and memorable event. Whether you’re planning an intimate gathering or a grand celebration, one thing remains constant: the desire for a show-stopping cake that perfectly complements the occasion. If you’re searching for the ideal ring ceremony cake recipe to impress your guests and add a touch of sweetness to your special day, look no further. In this article, we’ll guide you through a delectable recipe that will not only satisfy your guests’ sweet cravings but also become a centerpiece of your celebration.
Why the Right Cake Matters
A ring ceremony, also known as an engagement or pre-wedding ceremony, is a time to celebrate the love and commitment between two people. The cake you choose for this occasion can enhance the festive atmosphere and reflect the joy of the event. A well-crafted cake not only tastes amazing but also serves as a visual delight, capturing the essence of your celebration and making it even more memorable.
Ingredients You’ll Need to cook Ring Ceremony Cake Recipe
To create a show-stopping ring ceremony cake, you’ll need the following ingredients:
For the Cake Layers:
- 2 ½ cups all-purpose flour
- 2 ½ teaspoons baking powder
- ½ teaspoon salt
- 1 cup unsalted butter, softened
- 1 ½ cups granulated sugar
- 3 large eggs
- 1 teaspoon vanilla extract
- 1 cup whole milk
For the Filling:
- 1 cup raspberry or strawberry jam (or your favorite fruit preserve)
- 1 cup fresh berries (optional, for added freshness)
For the Frosting:
- 1 cup unsalted butter, softened
- 3 ½ cups powdered sugar
- 1 teaspoon vanilla extract
- 2-3 tablespoons heavy cream
- Food coloring (optional, for decoration)
For Decoration:
- Edible flowers or gold leaf (for a touch of elegance)
- Fresh berries or fruit slices (for added flavor and decoration)
- Piping gel or icing (for intricate designs)
Instructions
1. Preparing the Cake Batter
- Preheat Your Oven: Start by preheating your oven to 350°F (175°C). Grease and flour two 9-inch round cake pans, or line them with parchment paper.
- Mix Dry Ingredients: In a medium bowl, whisk together the all-purpose flour, baking powder, and salt. Set aside.
- Cream Butter and Sugar: In a large mixing bowl, beat the softened butter and granulated sugar together until light and fluffy. This process usually takes about 3-5 minutes.
- Add Eggs and Vanilla: Incorporate the eggs one at a time, beating well after each addition. Add the vanilla extract and mix until combined.
- Combine Ingredients: Gradually add the dry ingredients to the butter mixture, alternating with the milk. Begin and end with the dry ingredients, mixing just until combined after each addition. Be careful not to overmix, as this can result in a dense cake.
- Pour Batter into Pans: Divide the batter evenly between the prepared cake pans. Smooth the tops with a spatula.
- Bake: Place the pans in the preheated oven and bake for 25-30 minutes, or until a toothpick inserted into the center comes out clean. Allow the cakes to cool in the pans for about 10 minutes before transferring them to a wire rack to cool completely.
2. Preparing the Filling
- Prepare Jam: If using fruit preserves, make sure it’s smooth and free of large chunks. If necessary, gently warm it to make spreading easier.
- Add Fresh Berries (Optional): If you like, mix in fresh berries for added flavor and texture. This step is optional but can enhance the overall taste of the cake.
3. Preparing the Frosting
- Cream the Butter: In a large bowl, beat the softened butter until creamy and smooth.
- Add Powdered Sugar: Gradually add the powdered sugar, beating on low speed to prevent a mess. Increase the speed and beat until the mixture is light and fluffy.
- Incorporate Vanilla and Cream: Add the vanilla extract and 2 tablespoons of heavy cream. Beat until combined. If the frosting is too thick, add the remaining cream, a little at a time, until you reach your desired consistency.
- Add Food Coloring (Optional): If you want to add color to your frosting, divide it into separate bowls and mix in food coloring as desired.
4. Assembling and Decorating the Cake
- Level the Cake Layers: Once the cakes are completely cooled, use a serrated knife to level the tops if necessary. This ensures even layers and a professional appearance.
- Spread Filling: Place one cake layer on a serving plate or cake board. Spread a layer of fruit jam (and fresh berries if using) evenly over the top.
- Add the Second Layer: Place the second cake layer on top of the filling. Gently press down to ensure it sticks.
- Apply a Crumb Coat: Spread a thin layer of frosting over the entire cake to seal in crumbs. Chill the cake in the refrigerator for about 30 minutes to set this layer.
- Frost and Decorate: Apply a final, thicker layer of frosting over the cake. Smooth the surface with a spatula or use a piping bag to create decorative patterns. Add edible flowers, fresh berries, or gold leaf for a touch of elegance.
- Add Finishing Touches: If you want to add intricate designs, use piping gel or additional icing to create beautiful decorations.
5. Serving and Enjoying
Once your ring ceremony cake is decorated and ready, it’s time to serve it. Cut the cake into slices and enjoy the sweet celebration with your guests. Remember, a cake that’s both visually appealing and delicious will be a hit at any gathering.
Tips for a Perfect Ring Ceremony Cake
- Plan Ahead: Make sure to plan and prepare ahead of time. Baking and decorating a cake can take several hours, so allocate sufficient time before the ceremony.
- Use Fresh Ingredients: High-quality ingredients make a big difference in taste. Opt for fresh butter, real vanilla extract, and high-quality fruit preserves.
- Practice Makes Perfect: If you’re new to cake decorating, practice your techniques on a smaller cake or cupcakes before working on your ring ceremony cake.
- Stay Organized: Keep your workspace clean and organized to ensure a smooth baking and decorating process.
Creating the perfect ring ceremony cake involves more than just following a recipe—it’s about adding a personal touch that reflects the joy and significance of the occasion. With this ring ceremony cake recipe, you’ll be able to craft a beautiful and delicious centerpiece that will delight your guests and enhance the celebration of your special day.
By incorporating high-quality ingredients and paying attention to detail in your decorating, you can ensure that your cake will be a memorable and delicious highlight of your ring ceremony. So roll up your sleeves, preheat your oven, and get ready to bake a cake that will make your celebration even sweeter.
Feel free to experiment with different flavors, fillings, and decorations to create a cake that perfectly suits your style and preferences. Happy baking, and here’s to a joyous and unforgettable ring ceremony!
Frequently Asked Questions (FAQs) About Ring Ceremony Cake Recipe
Can I Use a Different Flavor for the Cake Layers?
Absolutely! While the recipe provided uses a classic vanilla flavor, you can easily customize it to suit your preferences. Consider substituting the vanilla extract with almond extract for a nutty twist, or add cocoa powder to the flour mixture for a chocolate cake. For a fruitier option, try adding lemon or orange zest to the batter. Just be sure to adjust the baking time if you change the flavor significantly.
How Do I Store the Cake Before the Ring Ceremony?
To keep your cake fresh before the event, store it properly. If the cake is frosted, cover it with a cake dome or place it in an airtight container. You can also use plastic wrap to protect the cake from drying out. For optimal freshness, keep the cake at room temperature if it will be consumed within a couple of days. If you need to store it for a longer period, refrigerate it, but make sure to let it come to room temperature before serving to enhance the flavor and texture.
Can I Make the Cake Ahead of Time?
Yes, you can prepare the cake ahead of time. Bake and cool the cake layers up to a week in advance. Once completely cooled, wrap the layers tightly in plastic wrap and store them in the freezer. Thaw the cakes in the refrigerator overnight before frosting and decorating. If you prefer, you can also freeze the frosted and decorated cake, though it’s best to do this without any delicate decorations that may not freeze well.
What Should I Do if My Cake Layers Are Uneven?
If your cake layers come out uneven, don’t worry—there are ways to fix it. First, use a serrated knife to level the tops of the cake layers. This will make it easier to stack and frost. Additionally, a crumb coat—a thin layer of frosting applied to seal in crumbs—can help create a smooth surface for your final layer of frosting. If the cake is too dry or crumbly, consider adding a simple syrup (a mixture of sugar and water) to moisten the layers before frosting.
How Can I Achieve Professional-Looking Cake Decorations?
To achieve a professional finish on your cake, follow these tips:
Invest in Quality Tools: Use high-quality cake decorating tools such as piping bags, tips, and offset spatulas.
Practice Techniques: Practice basic decorating techniques like smooth frosting application and piping on a smaller cake or cupcakes before working on your main cake.
Chill the Cake: Keep the cake chilled between decorating steps to help the frosting set and make it easier to work with.
Use Piping Gel: For intricate designs and fine details, use piping gel or royal icing. These can provide a more polished look and help with precision.
Add Finishing Touches: Consider using edible flowers, gold leaf, or fresh fruit for a touch of elegance and a professional appearance.