Nutty Bubble Cake Recipe: A Delightful Twist on Classic Cake
When it comes to baking, there’s always room to experiment and innovate. Enter the Nutty Bubble Cake—a delightful dessert that combines the comforting flavors of nuts with a playful, bubble-like texture. This cake is not only visually appealing but also offers a unique taste experience that’s sure to impress your family and friends. If you’re looking for a recipe that’s both delicious and eye-catching, this Nutty Bubble Cake is the perfect choice. In this article, we’ll guide you through a step-by-step Nutty Bubble Cake recipe, providing tips and tricks to ensure your cake turns out perfectly every time.
Why You’ll Love Nutty Bubble Cake
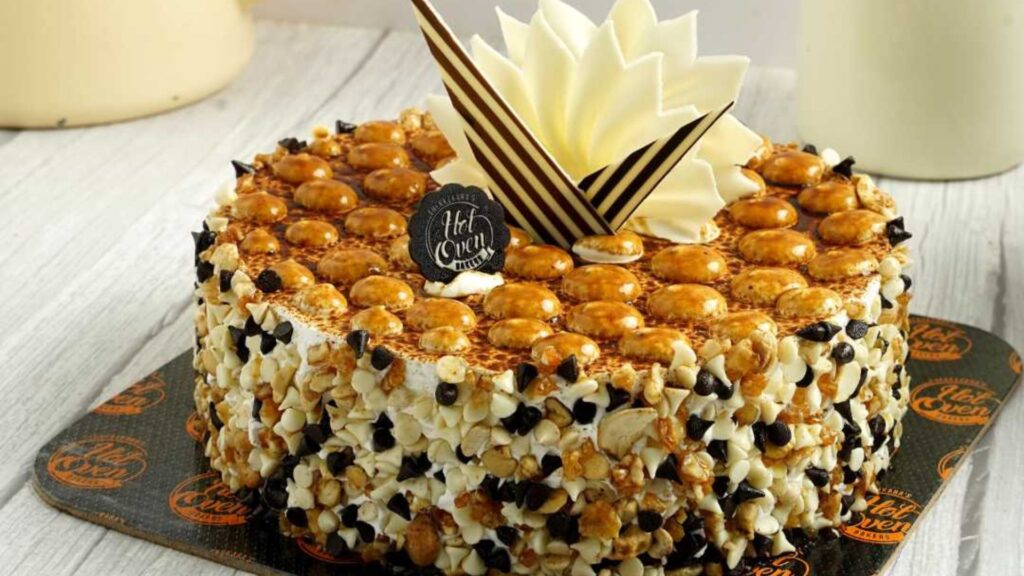
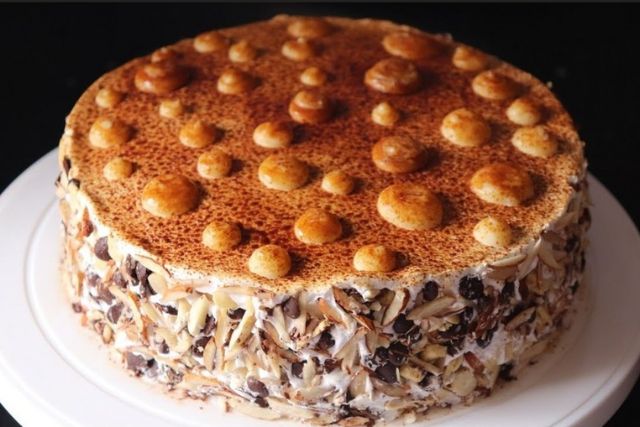
Nutty Bubble Cake is a modern twist on traditional cakes. It combines the crunchiness of nuts with a soft, airy texture that resembles bubbles, creating a delightful contrast in every bite. The cake’s unique texture and rich flavor make it an excellent choice for special occasions, holiday gatherings, or just a fun family dessert. Whether you’re a seasoned baker or a novice in the kitchen, this cake is approachable and rewarding.
Ingredients You’ll Need to Cook Nutty Bubble Cake Recipe

For the Cake:
- 1 ½ cups all-purpose flour
- 1 cup granulated sugar
- ½ cup unsalted butter, softened
- 3 large eggs
- 1 teaspoon vanilla extract
- 1 teaspoon baking powder
- ¼ teaspoon salt
- 1 cup milk
- ½ cup finely chopped nuts (such as almonds, walnuts, or pecans)
For the Nutty Bubble Topping:
- ½ cup chopped nuts (your choice)
- ¼ cup granulated sugar
- 2 tablespoons unsalted butter
- 1 tablespoon honey
- ¼ cup water
For the Frosting:
- 1 cup unsalted butter, softened
- 3 ½ cups powdered sugar
- 1 teaspoon vanilla extract
- 2-3 tablespoons heavy cream
- Food coloring (optional, for decoration)
Instructions
1. Prepare the Cake Batter
- Preheat Your Oven: Begin by preheating your oven to 350°F (175°C). Grease and flour an 8-inch round cake pan or line it with parchment paper for easy removal.
- Mix Dry Ingredients: In a medium bowl, whisk together the all-purpose flour, baking powder, and salt. Set aside.
- Cream Butter and Sugar: In a large mixing bowl, beat the softened butter and granulated sugar until light and fluffy. This process should take about 3-5 minutes.
- Incorporate Eggs and Vanilla: Add the eggs one at a time, beating well after each addition. Mix in the vanilla extract until combined.
- Combine Ingredients: Gradually add the dry ingredients to the butter mixture, alternating with the milk. Begin and end with the dry ingredients, mixing just until combined. Be careful not to overmix.
- Add Nuts: Fold in the finely chopped nuts. This will add a delightful crunch to the cake.
- Pour Batter into Pan: Pour the batter into the prepared cake pan and smooth the top with a spatula.
- Bake: Bake in the preheated oven for 25-30 minutes, or until a toothpick inserted into the center of the cake comes out clean. Allow the cake to cool in the pan for about 10 minutes before transferring it to a wire rack to cool completely.
2. Prepare the Nutty Bubble Topping
- Combine Ingredients: In a small saucepan, combine the chopped nuts, granulated sugar, unsalted butter, honey, and water.
- Cook the Mixture: Cook over medium heat, stirring constantly, until the mixture comes to a boil. Continue to cook and stir for about 3-5 minutes, or until the mixture thickens slightly.
- Cool and Set: Remove from heat and let the nutty topping cool slightly before spreading it over the cooled cake. The mixture will set as it cools, creating a delightful bubble-like texture.
3. Prepare the Frosting
- Cream the Butter: In a large mixing bowl, beat the softened butter until creamy and smooth.
- Add Powdered Sugar: Gradually add the powdered sugar, beating on low speed to prevent a mess. Increase the speed and beat until the mixture is light and fluffy.
- Incorporate Vanilla and Cream: Add the vanilla extract and 2 tablespoons of heavy cream. Beat until well combined. If the frosting is too thick, add more cream, one tablespoon at a time, until it reaches your desired consistency.
- Add Food Coloring (Optional): If you’d like to add color to your frosting, divide it into separate bowls and mix in food coloring to achieve your desired shades.
4. Assemble and Decorate the Cake
- Level the Cake Layers: Once the cake is completely cooled, use a serrated knife to level the tops if necessary. This will ensure even layering and a professional appearance.
- Apply a Crumb Coat: Spread a thin layer of frosting over the entire cake to seal in crumbs. Chill the cake in the refrigerator for about 30 minutes to set the crumb coat.
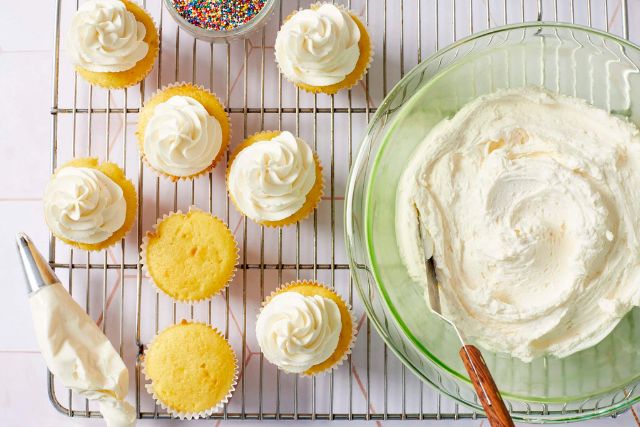
- Frost the Cake: Apply a final layer of frosting over the cake, smoothing it out with a spatula or using a piping bag for more intricate designs.
- Add the Nutty Bubble Topping: Once the frosting is applied, spread the nutty bubble topping over the cake. This will give the cake its signature bubble-like texture and a crunchy, nutty flavor.
- Add Final Decorations: If desired, use additional frosting or edible decorations to enhance the cake’s appearance. You can pipe decorative patterns, add edible glitter, or place whole nuts on top for extra flair.
5. Serving and Enjoying
Once your Nutty Bubble Cake is beautifully decorated and ready, it’s time to serve it. Cut the cake into slices and watch as your guests enjoy the unique combination of flavors and textures. The nutty topping provides a delightful crunch, while the cake itself remains soft and moist.
Tips for Perfecting Your Nutty Bubble Cake Recipe
- Use Fresh Ingredients: Quality ingredients make a big difference in taste and texture. Use fresh butter, real vanilla extract, and high-quality nuts for the best results.
- Monitor Baking Time: Keep an eye on the cake as it bakes to ensure it doesn’t overcook. Every oven is different, so baking times may vary slightly.
- Cool Completely: Make sure the cake is completely cooled before applying the frosting and nutty bubble topping. This prevents the frosting from melting and ensures a neat finish.
- Experiment with Nuts: Feel free to experiment with different types of nuts for the topping. Almonds, walnuts, and pecans all provide unique flavors and textures.
- Decorate Creatively: Don’t be afraid to get creative with your decorations. Use your favorite frosting techniques and add personalized touches to make the cake uniquely yours.
The Nutty Bubble Cake is a delightful and unique dessert that brings together the crunchiness of nuts with a soft, airy cake texture. This recipe is perfect for anyone looking to add a fun twist to their baking repertoire. Whether you’re celebrating a special occasion or simply indulging in a sweet treat, this cake is sure to impress with its delicious flavors and eye-catching appearance.
With its easy-to-follow steps and versatile ingredients, the Nutty Bubble Cake is a fantastic choice for both seasoned bakers and novices alike. So gather your ingredients, preheat your oven, and get ready to create a cake that’s as delightful to eat as it is to look at. Happy baking, and enjoy the sweet rewards of your Nutty Bubble Cake!
Frequently Asked Questions (FAQs) About Nutty Bubble Cake Recipe
Can I Use Different Types of Nuts for the Nutty Bubble Topping?
Absolutely! The recipe is quite versatile, and you can use a variety of nuts for the topping depending on your preference. Almonds, walnuts, pecans, and hazelnuts all work well. If you prefer a specific type of nut or have a favorite, feel free to substitute it in the recipe. Just make sure to chop the nuts finely to ensure they integrate well with the sugar mixture and create the desired bubble texture.
Can I Make the Cake Ahead of Time?
Yes, you can prepare the Nutty Bubble Cake ahead of time. To do so:
Unfrosted Cake: Bake and cool the cake layers. Wrap them tightly in plastic wrap and store them in the freezer for up to 3 months. Thaw them in the refrigerator overnight before frosting.
Frosted Cake: If you need to freeze a frosted cake, make sure it is well-wrapped in plastic wrap and aluminum foil to prevent freezer burn. Thaw it in the refrigerator before serving. Apply the nutty bubble topping just before serving for the best texture and flavor.
How Can I Prevent My Cake from Sticking to the Pan?
To ensure your cake comes out of the pan smoothly, follow these tips:
Grease and Flour the Pan: Thoroughly grease the cake pan with butter or non-stick spray and lightly flour it. Alternatively, use parchment paper to line the bottom of the pan.
Use a Non-Stick Pan: Consider using a non-stick cake pan, which helps with easy release.
Cool Properly: Allow the cake to cool in the pan for about 10 minutes before transferring it to a wire rack. This helps the cake set and reduces the risk of it sticking.
What Can I Do if My Frosting Is Too Thin or Too Thick?
If your frosting isn’t the right consistency, here’s how to fix it:
Too Thin: If your frosting is too thin, gradually add more powdered sugar, mixing well after each addition until it reaches the desired thickness. You can also add more butter if needed.
Too Thick: If your frosting is too thick, add a little heavy cream or milk, one tablespoon at a time, until it reaches a spreadable consistency. Be careful not to add too much liquid, as this can cause the frosting to become too runny.
How Can I Achieve a Smooth Finish on My Cake?
To achieve a smooth and professional-looking finish on your cake, follow these steps:
Crumb Coat: Apply a thin layer of frosting (the crumb coat) over the entire cake to seal in crumbs. Chill the cake in the refrigerator for about 30 minutes to set the crumb coat.
Smooth Frosting: Apply a thicker layer of frosting over the chilled crumb coat. Use an offset spatula or a bench scraper to smooth the frosting. Dip the spatula in hot water, then wipe it dry, to help achieve a smoother finish.
Chill Between Layers: If needed, chill the cake between frosting applications to help the frosting set and make it easier to smooth.


